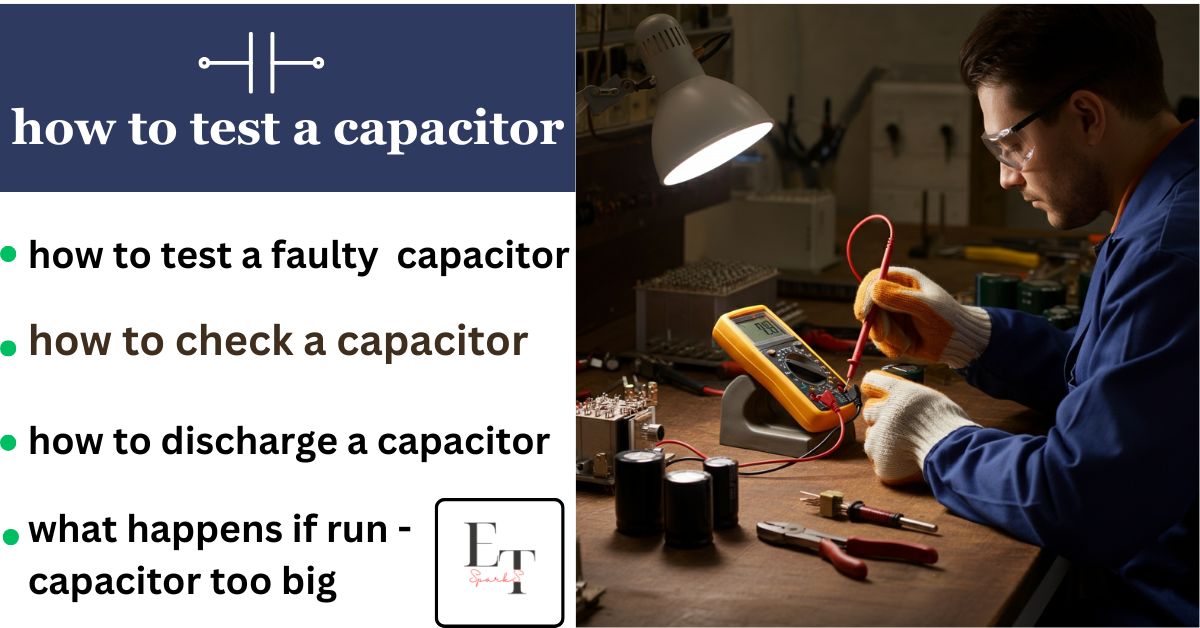
Testing a capacitor is an essential skill for diagnosing electrical issues. Whether you’re troubleshooting a circuit board or maintaining a home appliance, knowing how to properly Capacitor Testing can save time and effort. That said, working with capacitors requires understanding basic safety measures and the right tools. This guide will walk you through everything you need to know about testing a capacitor safely and effectively.
What Is a Capacitor?
Before diving into the steps, let’s quickly cover what a capacitor is. A capacitor is an electronic component that stores and releases electrical energy in a circuit. It’s widely used in various applications, from powering motors and smoothing voltage fluctuations to enabling signal filtering in audio devices. When a capacitor malfunctions, it can disrupt the entire system, so testing is key to identifying and resolving issues.
Safety Precautions Before Testing – Test a Capacitor
to Test a Capacitor – Safety should always be your top priority when working with electrical components. Capacitors can store potentially hazardous electricity, even after the device has been powered off. Follow these essential precautions to ensure a safe testing process:
- Power Off and Unplug: Make sure the device you’re testing is completely powered down and unplugged to avoid electric shock.
- Discharge the Capacitor: Use a discharging tool (such as a resistor and insulated wires) to safely release any stored charge.
- Wear Protective Gear: Always wear gloves and eyewear to protect against electrical hazards.
- Set Your Multimeter Correctly: Use the correct voltage range on your multimeter to prevent damage to the tool or injury.
- Double-Check the Component: Ensure that you’re testing the correct capacitor and using the appropriate tools to avoid mistakes.
Tools You’ll Need
To Capacitor Check, gather the following tools and equipment:
- A multimeter (digital or analog) with a capacitance mode
- A capacitor discharge tool
- Insulated gloves and safety glasses
- Access to the device’s user manual, if applicable, for reference.
How toTest a Capacitor – Step-by-Step Instructions

Step 1: Power Off and Unplug the Device
for Test a Capacitor – Ensure the device you’re working on is completely powered down and unplugged from any electrical source. This reduces the risk of an electric shock.
Step 2: Safely Discharge the Capacitor
Capacitors can retain an electrical charge even when disconnected from a circuit. To safely discharge the capacitor:
- to Test a Capacitor : Connect a resistor to insulated wires.
- Attach one end of the wire to each terminal of the capacitor, ensuring you do not touch the terminals directly.
- Wait for a few seconds for the stored electricity to dissipate.
Important: Never use a screwdriver to discharge a capacitor as it can cause sparks and damage the component.
Step 3: to Test a Capacitor : Set Up Your Multimeter
- If your multimeter has a capacitance mode, select it. Otherwise, set it to a high resistance (ohms) range.
- Ensure the multimeter is functioning correctly by testing it on a known working component.

Step 4: Test the Capacitor
Using a Multimeter with Capacitance Mode:
- to Test a Capacitor – Disconnect the capacitor from the circuit (if it isn’t already).
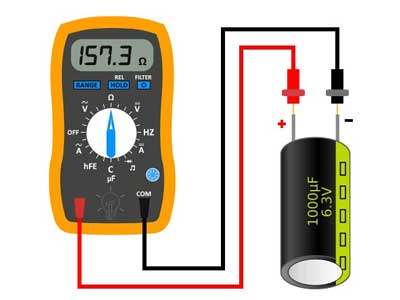
- Connect the multimeter probes to the capacitor terminals (red probe on positive and black probe on negative for polarized capacitors).
- Check the reading on the multimeter display:
- If the reading matches the capacitor’s rated capacitance (within an acceptable range), the component is likely good.
- If the reading is significantly lower or displays “0,” the capacitor may be faulty.
Using a Multimeter in Resistance Mode:
- for Test a Capacitor – Attach the probes to the capacitor terminals.
- Observe the multimeter display:
- to Test a Capacitor – The resistance should initially show a low value and then gradually increase, indicating the capacitor is charging.
- If the resistance doesn’t change or stays at zero, the capacitor is likely damaged.
Step 5: Interpret the Results
Consult the capacitor’s specifications, usually printed on the side of the component, to verify the correct capacitance or resistance values. If the readings are outside the expected range, the capacitor may need to be replaced.
Step 6: Reinstall or Replace the Capacitor – Test a Capacitor
If the capacitor is functional, you can reinstall it carefully following the device’s manual. If it’s defective, replace it with a capacitor of the same specifications.
Additional Tips for Test a Capacitor
- Always double-check the polarity when reconnecting a polarized capacitor to avoid damaging the circuit.
- If you’re frequently working with capacitors, investing in a dedicated capacitance tester might make the process quicker and more accurate.
- Keep a log of tested components and their results for future reference, especially when troubleshooting complex circuits.
When to Consult a Professional
While these steps are designed for DIY enthusiasts or professionals with some technical knowledge, there are situations where consulting a professional is a safer option:
- If you’re unsure how to properly discharge a capacitor.
- If you don’t have the right tools or protective equipment.
- If the capacitor is in a high-voltage or critical system, such as an HVAC unit or industrial machinery.
Tools You’ll Need to Test a Capacitor
Here’s what you’ll need to get started:
- A digital multimeter
- Insulated gloves and safety goggles
- A resistor for discharging the capacitor
How toTest the Capacitor (Step-by-Step)
1. Discharge the Capacitor
- Disconnect the capacitor from the circuit.
- Use a resistor to safely discharge the capacitor by connecting it across the terminals. If you’re wondering how to discharge a capacitor correctly, always opt for this method to avoid damaging the capacitor or risking injury.
2. Set Up Your Multimeter – Test a Capacitor
To check the capacitor, you’ll need your multimeter. If you’re unsure how to check a capacitor with a multimeter, follow these steps:
- Switch the multimeter to the capacitance measurement mode (look for the “Cap” symbol).
- Attach the multimeter probes to the terminals of the capacitor (red to positive, black to negative).
3. Measure the Capacitance – Test a Capacitor
The multimeter will display the capacitance value. Compare the reading with the capacitor’s rated value indicated on its body:
- Good Condition: If the measured value is close to or matches the rated value.
- Faulty Capacitor: If the measured value is significantly lower or shows no reading, the capacitor may be faulty and should be replaced.
4. Testing Electrolytic or Polarized Capacitors
For polarized capacitors (like tantalum or aluminum electrolytic capacitors) ensure the multimeter probes match the correct polarity. If you’re working with polar capacitors, it’s crucial to understand how to pace polar capacitor to avoid errors during testing.
Common Questions About Capacitors
What Happens if the Run Capacitor is Too Big or Too Small?
If too big: Using an oversized run capacitor in a system can increase stress on the motor, leading to overheating or premature damage. What happens if run capacitor too big? It can negatively impact motor efficiency.
If too small: Conversely, a capacitor that’s too small for the application may result in the motor failing to start or perform optimally. Knowing what happens if run capacitor too small can help you determine the right capacitor size.
Can I Use a Larger Startup Capacitor?
Using a larger startup capacitor might seem like an attractive solution for motors struggling to start. But can I use a larger startup capacitor? While it can provide more starting torque, it may also lead to overheating or damage to the motor over time. Always refer to manufacturer specifications.
What Types of Motors Need Run Capacitors?
Single-phase AC motors, including fans, air conditioners, and compressors, typically require run capacitors to function efficiently. Knowing what types of motors need run capacitors will help you select the right components for the job.
Recap and Final Tips
Testing a capacitor is a simple yet essential task for maintaining the health of your electrical systems. A quick recap of what you’ve learned:
- Always follow safety precautions.
- Use a multimeter to measure capacitance value.
- Ensure capacitors are properly discharged before handling.
Whether you’re learning how to check a capacitor, selecting the right polar capacitor placement, or wondering what does a tantalum capacitor do, these steps will guide you through the process.
Final Thoughts of Test a Capacitor
Testing a capacitor might seem daunting at first, but with the right tools and precautions, it’s a straightforward process. By regularly testing capacitors, you can maintain the efficiency of your electrical devices and avoid costly replacements or repairs.
Remember, safety comes first. Always double-check your setup, and don’t hesitate to reach out to a professional if you’re unsure.
Got questions or tips about capacitor testing? Share them in the comments below! Your input could help others tackle their next project with confidence.
Pro Tip: Regular maintenance and testing can save your devices from potential failures caused by faulty capacitors.
If you have more questions or need to explore related topics, feel free to leave a comment below. Happy testing!
Also Read :
Different Types of Capacitors – A Complete Guide – it’s uses and applications
